Thinking about setting up a WordPress membership site? Whether you’re looking to share your expertise, connect with a community, or maybe even make some extra cash, you’re on the right track.
The creator economy is booming, and it’s not slowing down anytime soon. Here are some stats and figures to illustrate this better:

- LMS Market Growth: In 2022, the global Learning Management System (LMS) market hit $16.19 billion, up from $14.43 billion in 2021.
It’s on track to reach a whopping $47.47 billion by 2030, growing at a 14.6% CAGR (Fortune Business Insights).
- North America’s LMS Usage: Tops the chart for the largest use of LMS platforms.
- Europe’s LMS Market: Expected to be the region with the fastest growth in LMS usage.
- North America’s LMS Usage: Tops the chart for the largest use of LMS platforms.
- Rise in Association Memberships: About 44% of associations noticed a membership increase between 2022 and 2023 (GrowthZone).
- Member Engagement: 27% of associations observed better member engagement in the same period (GrowthZone).
- Digital Subscription Boom: Valued at $650 billion in 2022.
- Future of Digital Subscriptions: Predicted to balloon to $1.5 trillion by 2025 (Lineup).
- Subscription Services in the US: A significant jump from 182 million users in early 2020 to 205 million in recent times.

It’s pretty clear, isn’t it? The subscription industry is showing no signs of slowing down. And guess what? Setting up a membership site has become super easy.
Let’s explore why WordPress is your best bet, and how to make the most of it.
Why Choose WordPress?

WordPress has come a long way since its 2001 debut as a blogging platform.
Today, it’s the top choice for various types of websites, including membership sites.
Here’s what makes WordPress stand out:
- User-Friendly Interface: Its intuitive design means you don’t need to be a tech expert to get around.
- Market Leader: Dominating with a 60.8% share in the CMS market, WordPress is a popular choice among site builders.
- Rapid Growth: The platform sees over 500 new sites daily, far outpacing other platforms.
- Extensive Plugin Directory: With over 55,000 plugins, the possibilities for customization are nearly endless.
- Proven Financial Success: Sites using MemberPress, the #1 monetization, LMS, and membership plugin, have collectively earned over $1 billion.
With the right plugin, you can use WordPress to craft an incredibly profitable membership site – without the need for coding.
What’s a Plugin, and Why Do I Need One?

Plugins are the backbone of WordPress’s versatility. They essentially extend your site’s capabilities by adding functions to the WordPress platform.
When it comes to building a WordPress membership site, a single plugin is just the beginning. You’ll likely end up gathering an assortment of them!
Envision each plugin as a unique software component that effortlessly becomes a part of – or “plugs into” – your WordPress environment.
After their installation, these plugins start to shine, each bringing new and exciting capabilities to your website.
And in the world of WordPress, you’ll find an impressive variety of plugins –thousands, in fact, and many are free.
Need to make your site support multiple languages? There’s a plugin for that.
Want to create a forum exclusively for members? You’ve got it, there’s a plugin for that, too.
Looking for a way to handle subscriptions and payments? You’re in luck – there’s a plugin for exactly that purpose.

Launching your WordPress membership site starts with at least one essential plugin. But why limit yourself?
With so many plugins available, feel free to experiment and combine them. Your website is like a workshop, and plugins are your tools – mix and match to see what combinations work best for you!
Here are some practical tips for using plugins effectively:
- Identify Your Needs: Start by figuring out what your membership site really needs. This could range from user registration to securing your content.
- Research and Select: Not every plugin is the same. Take your time to look around, read reviews, and try a few out to find the perfect fit for your site.
- Balance is Key: Remember, loading your site with too many plugins can slow it down. Choose what you really need to keep things running smoothly.
- Stay Up-to-Date: Regularly update your plugins to keep your site running well and secure.
- Backups are Essential: With several plugins running, it’s important to back up your site regularly to protect against any unexpected issues.
Ultimately, the success of your WordPress membership site depends a lot on the plugins you choose.
They’re the tools that’ll bring your project to life.
Now that we’ve covered the ins and outs of selecting and managing WordPress plugins, it’s time to delve deeper into what a WordPress membership site actually is.
Understanding the core of a membership site will help you tailor your plugin choices even more effectively, ensuring every tool and feature aligns perfectly with your site’s goals and your audience’s needs.
What’s a WordPress Membership Site?
Simply put, a membership site is a website where users sign up to access exclusive content.
The type of content can vary widely, from digital products and podcasts to online courses and member-exclusive forums.
Think of it like a special VIP area – sometimes known as a paywall or content gate – where the good stuff is kept under lock and key, just for members.
Membership sites offer the flexibility to mix free and paid content, catering to a broad audience.
What can be behind these gates? Pretty much anything:
- Subscriptions to exclusive content
- Digital and physical products
- Podcast episodes
- Blog posts with insider tips
- Ebooks full of knowledge
- White papers with in-depth research
- Galleries of unique images
- Engaging audio content
- Must-watch videos
- Comprehensive online courses
- Personalized coaching sessions
- Vibrant online communities, clubs, and forums
- Interactive virtual conferences
- Special deals and promotions
…and the list goes on – your imagination is the limit!
A few key things to understand about membership sites:
- Versatile Content Options: You can offer content for free, charge for it, or mix it up with both free and paid options.
- Mixing It Up: Often, these sites aren’t one-trick ponies. For instance, a photography site might offer a blend of digital downloads, exclusive forums, and instructional courses – all in one spot.
- Size Matters: Sometimes, the membership element is just one part of a bigger picture. For example, the Norman Rockwell Museum uses MemberPress to handle its membership program, while the rest of its site explores everything else about the museum.
- All-In-One: On the flip side, some sites are all about membership. Take Pilatesology, for instance. This group uses MemberPress to manage their whole platform – from instructional content to forums and videos.
Check out our Membership Sites 101 video below for a really in-depth introduction to membership sites.
4 Non-Negotiable Features for Your Membership Site Plugin

By now, you’ve probably realized that a plugin is your golden key to unlocking a membership site on WordPress. But hold on, not every plugin is cut from the same cloth.
Here are four essential features you’ve got to have in your membership site plugin (and yep, MemberPress checks all these boxes).
1. Member Registration and Login
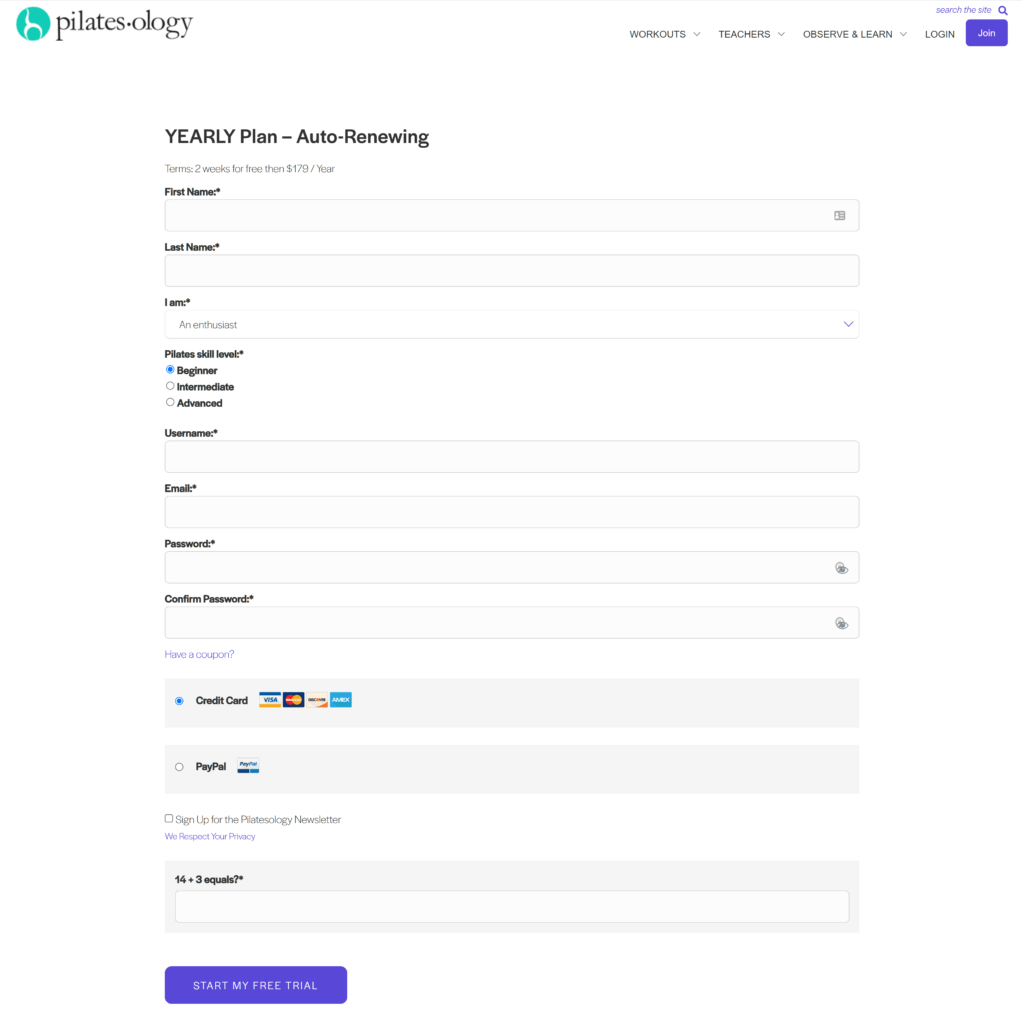
Think of your website like a club – you need a spot where guests can sign up and become official members. That’s where a solid membership plugin steps in.
It helps you create a welcoming registration page, making it a breeze for your visitors to join the club. Imagine a page like the one Pilatesology has, inviting and easy to navigate.
And here’s a cool thing about WordPress: it comes with preset roles like administrator, author, editor, and contributor.
When someone signs up, your plugin will help assign the right role to each new member.
But the journey doesn’t end at sign-up.
Members will need a way to log in every time they drop by your site, especially to get into those members-only areas.
A good plugin provides a secure and user-friendly login page – think of it as the guard at the gate, ensuring only the VIPs get through to your exclusive content.
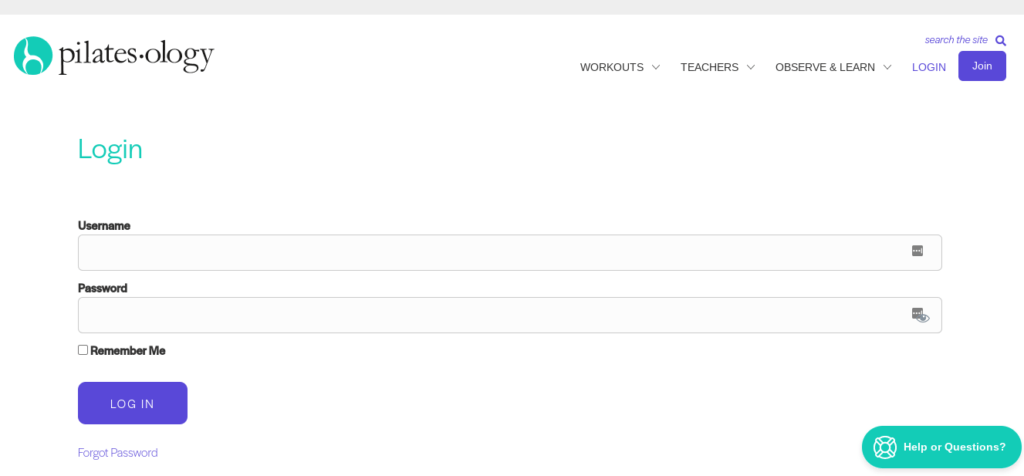
Once someone becomes a subscriber or member of your site, they’ll need their own ‘secret entrance’ to log in each time they swing by. This login portal is like the VIP pass to all your exclusive content.
Take a look at how Pilatesology does it – their login page stands as the trusty gatekeeper, making sure only members get to see the premium stuff.
2. Member Profile Editing
Just like in a social club, members of your site need their own space to manage their profiles.
A good membership plugin gives them the power to do just that.
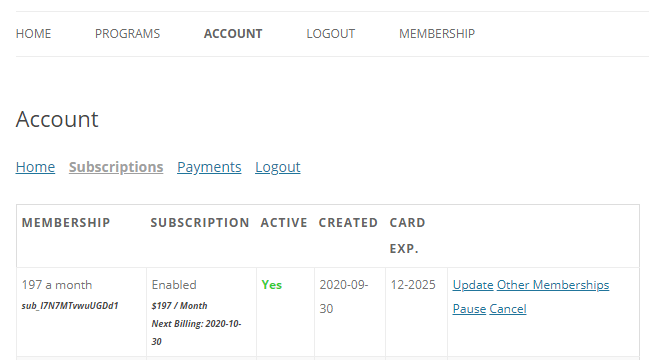
On the MemberPress Account page, it’s like each member has their own control panel.
Here, they can tweak their profile details, peek at their payment history, reset those pesky forgotten passwords, and keep their credit card info up to date.
It’s all about giving members the reins to manage their own space on your site.
➡️ PRO TIP – Ready, Set…SELL with ReadyLaunch™ ⬅️
Building a slick, mobile-friendly website can be super intimidating, especially if you’re not a tech whiz.
But here’s the cool part: ReadyLaunch™ by MemberPress is this awesome tool that makes the whole website-building process a breeze.
You can come up with sleek and professional-looking pages in just one minute! All that with zero coding!
Don’t believe us? Watch the video below (we timed the entire process!).
3. Payment Processing
Ever been at a checkout and just gave up because it was too complicated?
We’ve all been there, and it’s a surefire way to lose a sale or cause cart abandonment. That’s why your plugin needs a super straightforward payment process.
It’s crucial that your customers can breeze through buying your products, using whatever payment method they’re comfortable with.
Just as important is your ability to bill and invoice with pinpoint accuracy and efficiency.
After all, a smooth and hassle-free payment experience keeps everyone smiling.
And something exciting to note: MemberPress has introduced a significant enhancement with the integration of Stripe International Payments, offering 24 new ways to pay.
This latest feature also comes with 11 Euro-based payment methods. This means we’re making things way easier for folks all around the world.
It’s a real game-changer for online shopping, offering a bunch of flexible and super user-friendly payment options. How cool is that?
Check out this video on easy it is to integrate Stripe in MemberPress.
Your members should be able to snap up your offerings using their preferred payment method, be it credit card or trendy digital wallets like Apple Pay or Google Pay.
The cherry on top? Your plugin should handle both one-off and recurring subscription payments like a pro.
Smooth and secure transactions keep everyone happy – your members for the ease of use, and you for the reliable billing.
4. Essential Site Management Features
Think of site management features as the backstage crew of your membership site. They can turn the whole experience from a headache-inducing puzzle into a smooth-sailing journey.
Sure, WordPress’s basic setup is user-friendly, but for a membership site, you need some extra muscle.
What kind of muscle? We’re talking about:
- In-depth data reporting to keep an eye on how your site’s doing.
- Smart management of member levels and subscriptions.
- A tight grip on transactions, so everything financial runs like clockwork.
- Detailed control over who gets to see what on your site, right down to specific posts, categories, or digital goodies.
MemberPress steps up as your backstage hero here, managing all these aspects fast and easy.
Some Handy Extras for Your WordPress Membership Site
While not essential, these plugins can give your site that extra edge, significantly boosting your marketing efforts.
After all, showcasing and selling your content is what it’s all about, right?
Tech Support
While not a traditional plugin, having solid tech support is crucial when setting up your MemberPress site.
Talk to us about buying dedicated developer hours as part of our Done For You membership site services.
We can help you at any stage of set up including building it from scratch, or to help you maintain your membership site.
Popup Tools
Want to grow your email list and generate more leads? Popups are your friend.
Using a plugin like OptinMonster, backed by marketing expert Neil Patel, makes this a breeze. Or try Adoric for its range of free templates – easy and effective.
Social and Community Forums
Adding a forum plugin not only sparks member interaction but also offers these perks:
- Buzz from shared experiences
- Valuable product feedback
- Helps in reducing churn rate (the rate at which members leave your site)
Email Services
Email remains a marketing powerhouse. Adding an email service plugin lets you engage your members through:
- Alerts about special events or promotions
- Announcements of new features
- Blog post marketing
- Reminders about membership renewals
That’s why MemberPress integrates with leading email systems such as ActiveCampaign and ConvertKit.
Event Registration
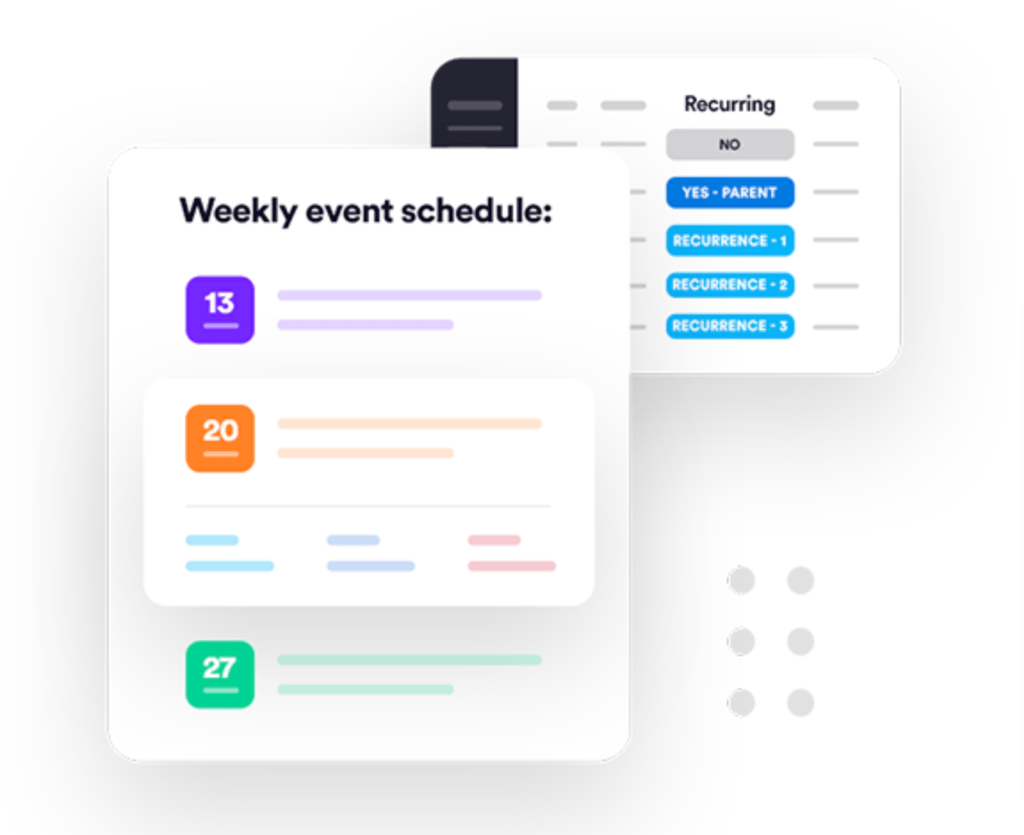
Used an email service for event announcements? Next, you’ll need a plugin for RSVPs.
This helps manage attendance, both for your events and for data reporting. WPEventin or Event Espresso come highly recommended.
Affiliate Marketing
This is a biggie. Affiliate marketing accounts for 15% of digital media revenue and can boost profits by 30%.
An affiliate marketing plugin, like our sister product Easy Affiliate, lets you manage your program efficiently, with no transaction fees.
It is absolutely the most affordable way to market your website.
This means you essentially have a commission-based sales crew on board. Affiliates earn their keep only when they clinch a sale, making this setup a fantastic win-win scenario for everyone involved.

Just as you’d guess, it pairs perfectly with MemberPress. But here’s a nice surprise – Easy Affiliate charges zero fees per transaction.
It’s a really valuable addition, and we totally recommend it for any membership site out there.
Gamification
Especially relevant for sites with online courses. Gamification plugins add elements like progress tracking and rewards, ramping up motivation and engagement.
Top picks? myCred and GamiPress.

Form Builders
More than just form creation, a solid form builder is like your no-fuss, no-code genie. It offers features like digital signatures, conversion tools, and customizations.
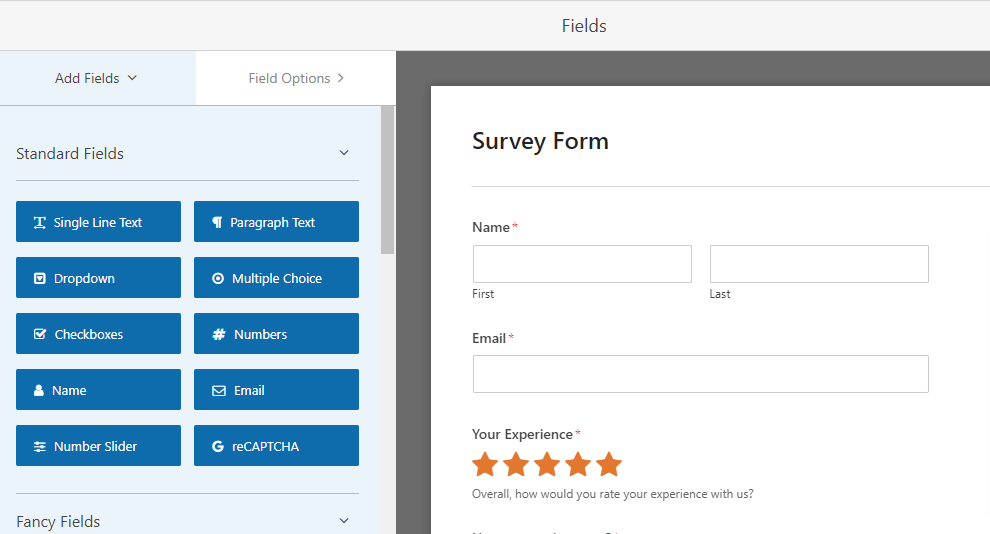
Moreover, it should also let you whip up all sorts of forms your site might need – from contact and payment forms to registration and surveys – all without needing to tangle with complicated coding.
Our favorites? WPForms and Formidable Forms.
Wrapping It Up
WordPress is a playground of possibilities.
To kickstart your WordPress membership site, MemberPress is a great first step. With the a vast array of other fantastic plugins to play with, you’re only limited by your imagination.

Get MemberPress Today!
Start getting paid for the content you create.
Got questions about setting up your WordPress membership site? Drop them in the comments.
If you liked this article, be sure to follow us on Facebook, Twitter, Instagram, Pinterest, and LinkedIn! And don’t forget to subscribe to our newsletter!


Add a Comment